
Git is a popular distributed version control system (VCS), often used for collaborative software development. It is created in 2005 by Linus Torvalds for use in developing his Linux kernel and it is maintained by Junio Hamano since then.
As of 2022, nearly 95% of software developers use Git as their primary version control system. There are many popular Git repository hosting services, including GitHub, GitLab, Bitbucket and Sourceforge.
This post will guide you through git commands.
Initializing a repository with git init
If you want to initalize an empty Git repository, you can use git init command like this:
1 | git init <repository_name> |
This command creates an empty working tree of a repository. A working tree is what software developer works on. Git servers however have bare repositories, which can be created with git init command with a --bare parameter like this:
1 | git init --bare <repository_name> |
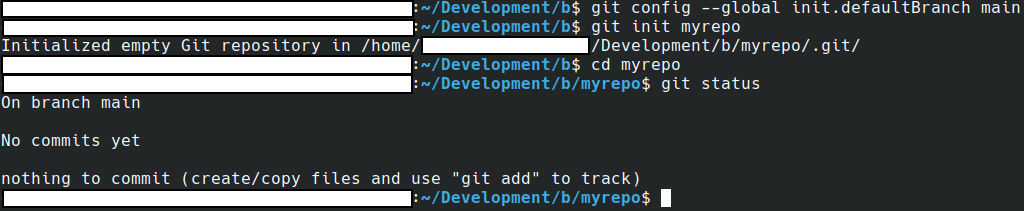
The default branch is master. If you want to initalize repositories with default branch other than master, you can run this command before initializing the repository:
1 | git config --global init.defaultBranch <branch> |
Setting up the origin…
If you have an empty remote Git repository and an newly-initalized local repository, you can use this command:
1 | git remote add origin <remote_repository_path> |
The remote repository path can be accessed through Git protocol (like git://repo.or.cz/svrjs.git), SSH (like ssh://git@repo.or.cz/svrjs.git), HTTP(S) (like https://git.svrjs.org/svrjs.git) or local computer (like /home/username/mynewrepository)
If you want to change the origin, you can use this command:
1 | git remote set-url origin <remote_repository_path> |
Cloning a repository with git clone
Often, you need to clone a Git repository to your development environment, e.g. to contribute to the project, or simply to build some program from source code. In this case you can use this command:
1 | git clone <remote_repository_path> |
If you want to replicate the repository into a server, you can use this command (it clones into bare repository):
1 | git clone --bare <remote_respository_path> |
If you want to clone specific branch, you can add -b <branch> parameter.

Changing the code
After editing the code, you can commit the changes to the repository. But before committing these changes, you will need to include the files to be committed like this:
1 | git add <files> |
You can also use git add . to prepare entire current working directory.
After including the files, you can commit using this command:
1 | git commit |
Or with specified commit message:
1 | git commit -m <commit_message> |
If you want to also commit without a prior git add command, you can use this command:
1 | git commit -a |
If something gone wrong with the commit, you can modify the current commit by adding --amend parameter to the git commit command.
If you don’t specify a commit message, you will fill it in the editor as shown below:
You may see “Please tell me who you are” prompt along with commands to set up your name and email address. You can use these commands:
1 | git config --global user.email <email_address> |
You can skip --global parameter to set it just for one repository.
You can also define files not to be included in commits through .gitignore file in the repository root. This file contains paths to files not included in commits. An example of a .gitignore file can be:
1 | node_modules |
In this case, node_modules and package-lock.json are not included in commits.
If you don’t want the commit, you can first off check which commit to revert via git log command. Once you found out the commit ID, you can use this command:
1 | git reset <commit_id> |
If you add --soft parameter, you will not remove files to be included in commits. If you add --hard parameter, any changes to files will disappear.
You can also use those as a commit ID:
HEAD- latest commitHEAD^- next to latest commitHEAD~4- four commits before the latest commitorigin/HEAD- latest commit in the originsomebranch- latest commit in thesomebranchbranch.sometag- latest commit tagged withsometagtag.
If you want also to create commit reverting the changes, you can use this command:
1 | git revert <commit_id> |
If you want to revert the changes for one file to the latest commit, you can use this command:
1 | git checkout -- <file_name> |
Pushing and pulling the changes!
After modfiying the code and committing the changes, you can use this command to push these changes to the remote server:
1 | git push |
Or if you are pushing a newly-initialized repository:
1 | git push --set-upstream origin <current_branch> |
Or if you want to push all the branches:
1 | git push --all origin |
You can replace master with whatever branch you want to create. You may be asked then for credentials for a remote Git server.
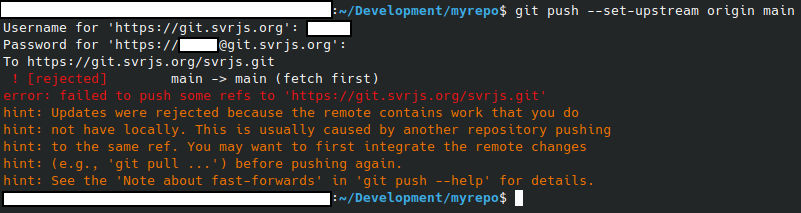
If you want to synchronize your repository with the remote repository (for example in situation shown above), you can use this command:
1 | git pull |
Or if you don’t want to merge the trees:
1 | git fetch |
Working with branches…
You can display all the local branches with this command:
1 | git branch |
You can also display both local and remote repositories using this command:
1 | git branch -av |

If you want to switch branches, you can use either git checkout or git switch command like this:
1 | git checkout <new_branch> |
Or like this:
1 | git switch <new_branch> |
If you want to create a new branch, you can use this command:
1 | git branch <new_branch> |
If you want to delete the branch, you can use:
1 | git branch -d <branch_to_delete> |
If you want to force the deletion, replace -d with -D.
If you want to move the branch, you can use:
1 | git branch -m [<branch_to_move>] <new_branch> |
If you skip <branch_to_move> parameter, the current branch will be moved. If you want to force the moving, replace -m with -M.
If you want to copy the branch to a new one, you can use:
1 | git branch -c [<branch_to_copy>] <new_branch> |
If you skip <branch_to_copy> parameter, the current branch will be copied. If you want to force the copying, replace -c with -C.
If you want to merge two branches, you can use this:
1 | git checkout <destination_branch> |
If you want to merge only one file, you can add -F <filename> parameter. Note, that you may need to manually modify files to fix merge conflicts.
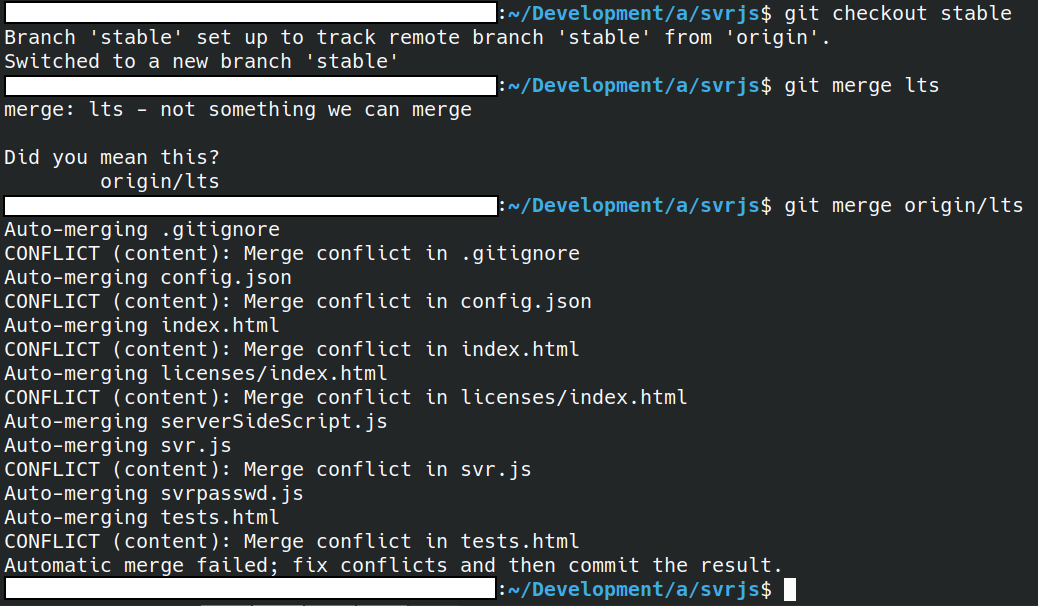
When facing merge conflicts, you may see this if you open a conflicting file: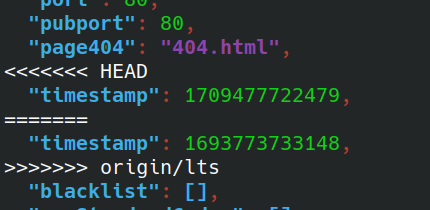
<<<<<<< marks the destination branch, >>>>>>> marks the source branch, while ======= separates the conflicting contents. There may be even |||||||, which marks original text in the conflicting area.
You may need to remove those marks and some of confliciting content. After resolving the conflict, you can run git commit in order to commit the merge.
If you want to rebase all commits on one branch to another branch, you can use this command:
1 | git rebase <branch_new_base> [<branch_to_rebase>] |
If you skip <branch_to_rebase> parameter, the current commit will be rebased.
If you want to tag a commit you can use this command:
1 | git tag <tag> [<commit>] |
If you skip <commit> parameter, the current commit will be tagged.
If you want to remove the tag, you can use:
1 | git tag -d <tag> |
If you want to push these tags, you can use:
1 | git push --tags |
Observe your repository!
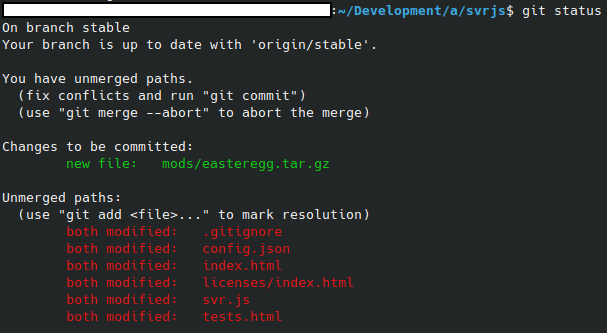
If you want to see the state of repository or list new or modified files not yet committed, you can use this command:
1 | git status |
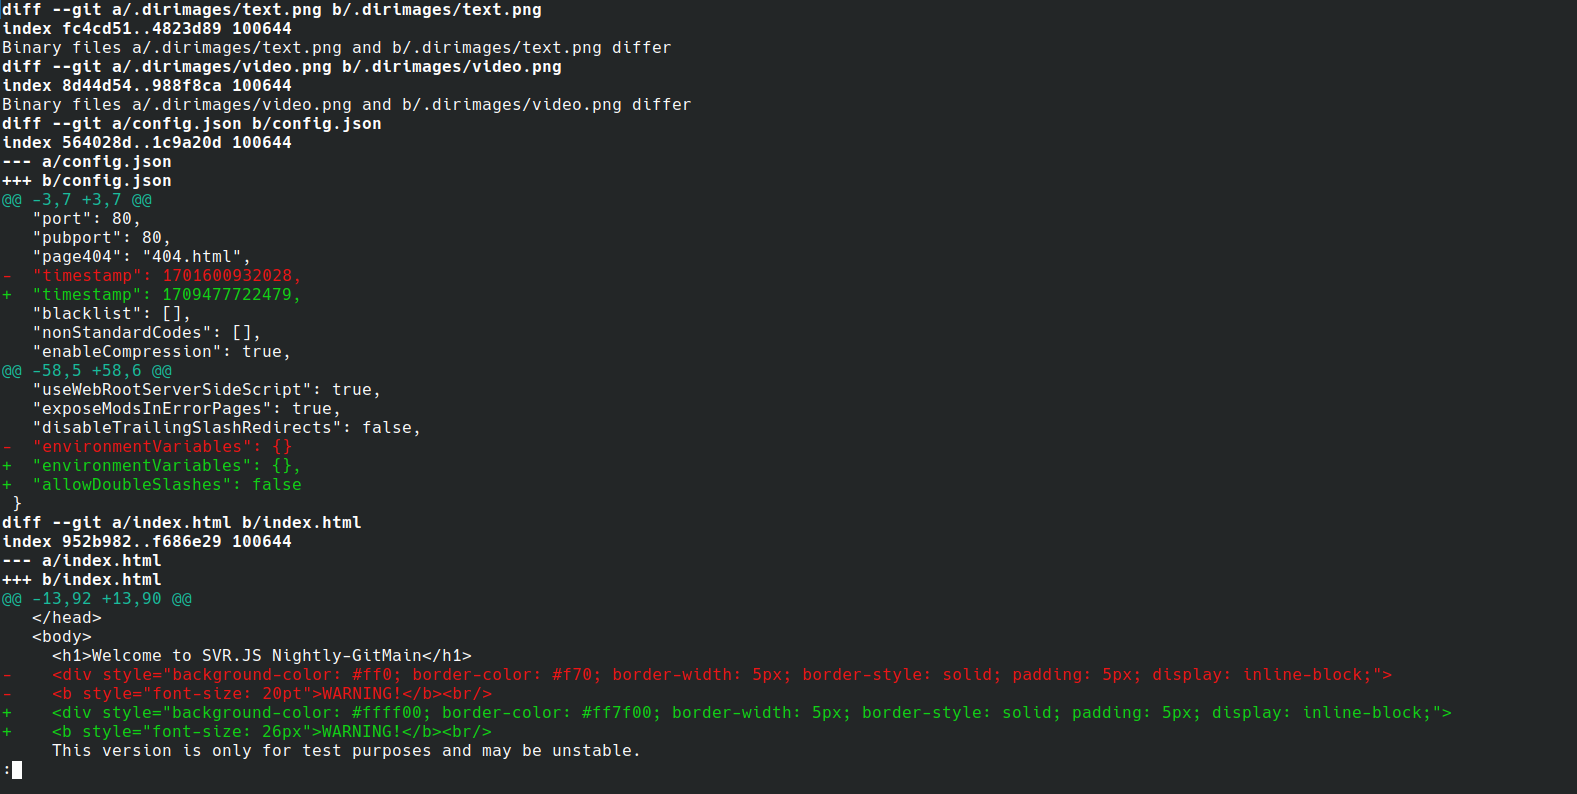
If you want to see changes to files not yet staged, you can use:
1 | git diff |
Or if you want to see changes to staged files:
1 | git diff --cached |
Or if you want to see both changes:
1 | git HEAD |
If you want to see changes between two commit IDs, then you can use this command:
1 | git diff <commit_id_1> <commit_id_2> |
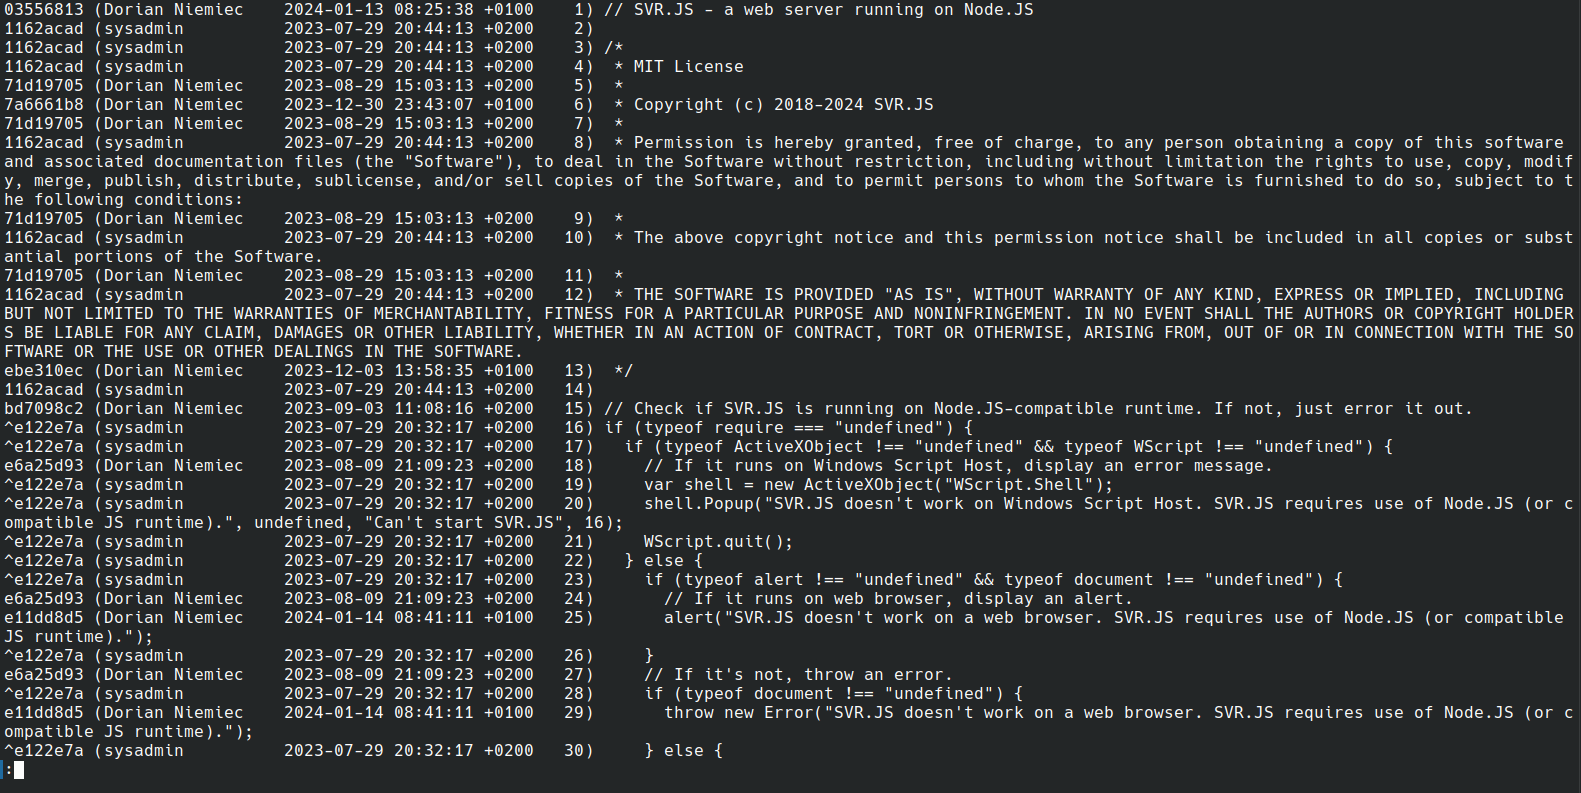
If you want to see author and dates for each change in the file, you can use:
1 | git blame <filename> |
If you want to show file at the specific commit, you can use:
1 | git show <commit_id>:<filename> |
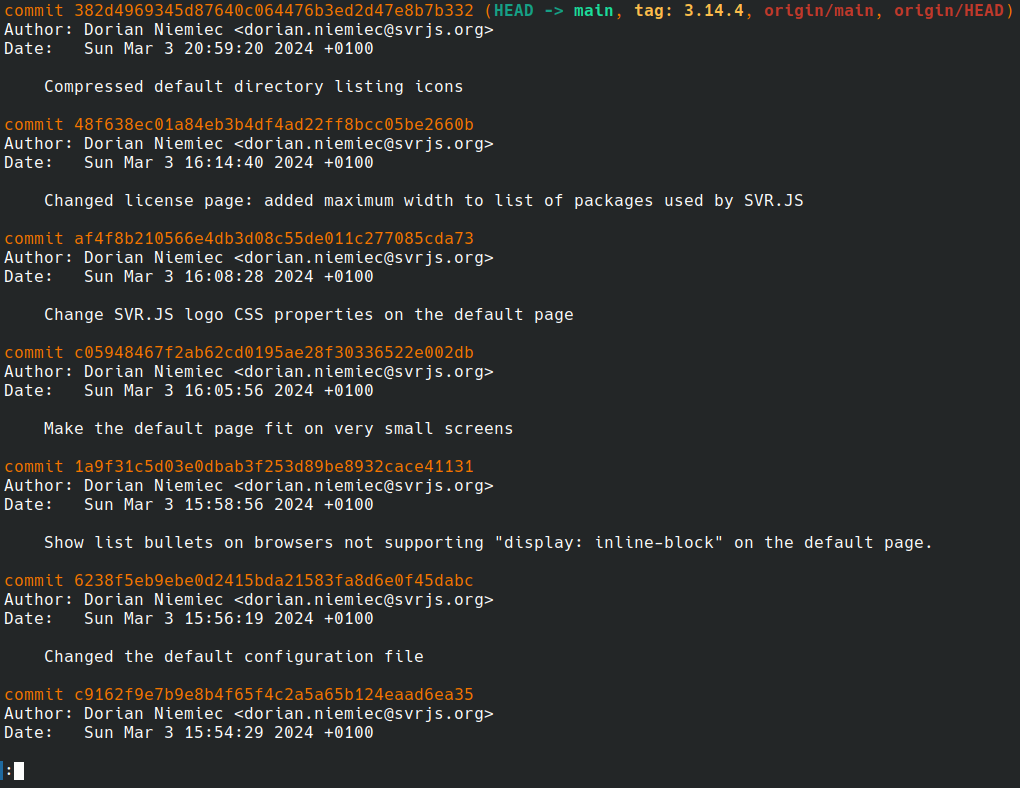
If you want to show entire Git commit history, you can use this command:
1 | git log |
Configuring Git itself with git config
If you want to configure Git, then you can use git config command:
1 | git config <option> <value> |
By default it is per-repository. For per-user configuration you can use --global parameter, while for system-wide one you can use --system parameter.
These are some of configuration options:
user.name- committer’s nameuser.email- committer’s email addresscore.editor- editor to usecolor.ui- if set totrue, thengitwill use colorsinit.defaultBranch- default branch when initializing a repository, defualt value ismasterhttp.sslVerify- if set tofalse, thengitwill not verify SSL/TLS certificates
You can also add -c <option>=<value> parameter to any git command (right after git, but before command name, such as clone, push or add)
You can see configuration options in The Git Book.
You can also list configuration parameters using this command:
1 | git config --list |
The repository configuration is stored in config file in .git directory in the repository directory. Per-user configuration is in .gitconfig file in the user home directory. System-wide configuration is stored in the /etc/gitconfig file.
Git patches
If you are contributing to open-source project that uses Git as version control system, you may need to send patches to project maintainers. You may need to first format the patches.
You can create regular patches using this command:
1 | git format-patch <commit_id> -o <directory_with_patches> |
You can then send these patches to project maintainers.
Project maintainers will then use the inverse of git format-patch command - the git apply command. First, the maintainer will check the statistics about patch:
1 | git apply --stat <patch> |
Then maintainers will perform a dry run to detect errors in the patch:
1 | git apply --check <patch> |
Finally, maintainers will apply the patch:
1 | git apply <patch> |
Maintainers may also apply series of patches with this command:
1 | git am <directory_with_patches> |
If you want to send emails using git command, you need to first configure the SMTP server like this:
1 | git config sendemail.smtpServer <smtp_server> |
Then format the patches with git format-patch command and send these patches with git send-email command like this:
1 | git send-email --to=<destination_email> <patches> |
Git command help
And finally, you can use this command for usage of specific git command:
1 | git <command> --help |
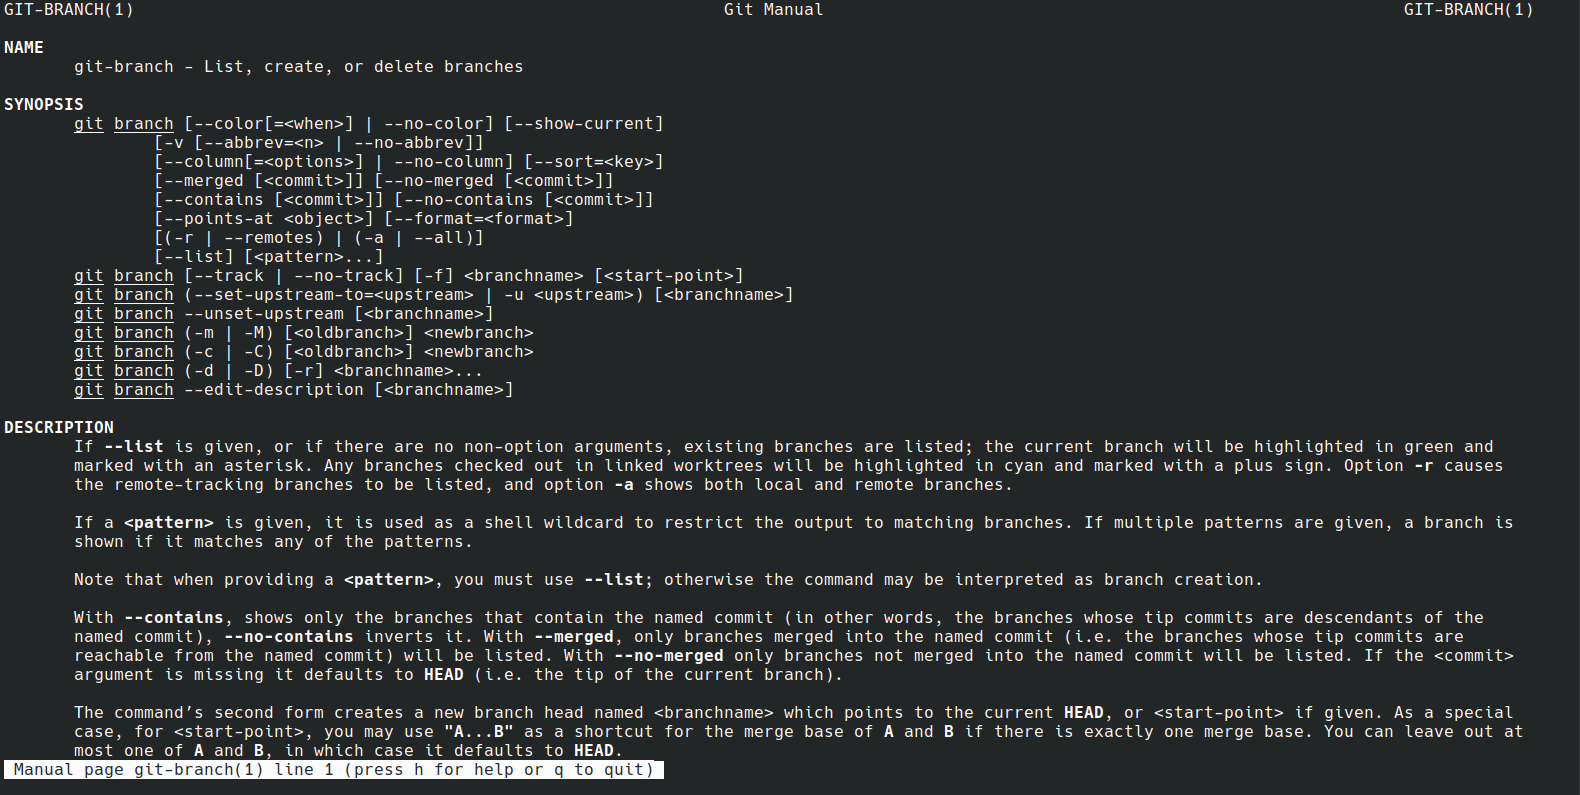
You may also see Git documentation for more information.